Studwork Timber, Straight Up: CLS, C16 and the '4x2' That Arrives Smaller

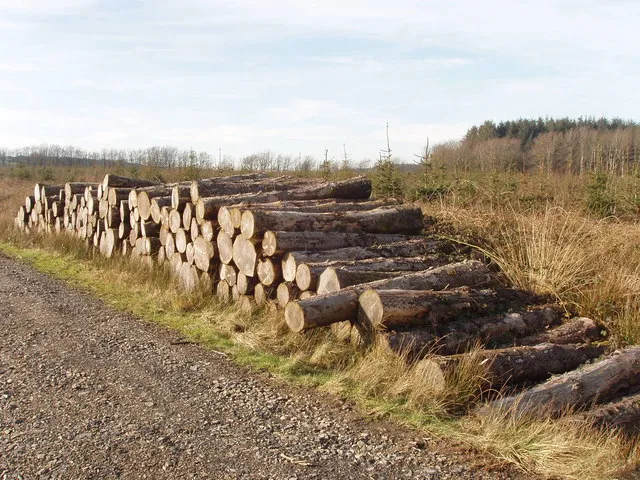
Photo: stacked timber studs CLS softwood in UK builders merchant yard, via www.game.guide
Ask for a few lengths of 4x2 at a busy counter and you can get three different things depending on which rack the yard points you to. That is not a conspiracy. It is just the timber trade being a bit loose with names that have been worn smooth by habit. If you are building a stud wall, a partition or a bit of general framing, the difference matters more than most people think.
At Walsh Woodyard we sell plenty of studwork timber, and we see the same handful of questions come through the gate. What is CLS? Do I need C16 or C24? Why is the 4x2 smaller than it used to be? Fair questions, all of them. Here is the straight answer, without the yard jargon.
The label is a starting point, not a guarantee
A merchant's rack label tells you what the yard intends that pile to be. It does not tell you that every stick is straight, dry, free from splits and fit for your wall. You still have to look at the timber. Check a few lengths for bow, twist and cupping. Look at the ends for deep splits. If the board has a big knot or a patch of pith running down one edge, it will be weaker and more likely to move.
That sounds obvious, but the counter is a fast place. People order by name and assume the name does the work. It does not. The name narrows the choice. Your eyes and hands finish the job.
CLS: regularised, not a strength grade
CLS stands for Canadian Lumber Standard. In a UK yard you will usually see it as regularised softwood with rounded corners and a planed finish. Common sizes include 38 x 63 mm, 38 x 89 mm and 38 x 140 mm, though ranges vary between suppliers.
CLS is handy stuff. It is consistent, it is easy to handle, and it is less splintery than rough sawn timber. That is why it turns up in so many internal partitions and general framing jobs. But CLS is a dimensional and finish description, not a strength class. A length of CLS can be C16, C24 or ungraded, depending on what the supplier has bought and how it has been marked.
So if someone says they want CLS for a loadbearing wall, the next question should be: graded to what? CLS alone does not answer that.
C16 and C24: what the stamp is telling you
C16 and C24 are strength classes. They tell you how the timber has been graded for structural use, usually against a recognised standard and with a mark on the piece. C16 is the more common grade for general work. C24 is stronger and stiffer, with tighter limits on defects, and it is often specified where spans, loads or building control requirements call for it.
For a simple internal non-loadbearing partition, C16 is often perfectly sensible. For a loadbearing wall, a floor or anything that has to satisfy a designer or building control, follow the specification you have been given. Do not let a rack label override a drawing. If the drawing says 47 x 100 C24, a 38 x 89 C16 substitute is not a clever swap. It is a different piece of timber doing a different job.
Also, check that the grade mark is actually on the timber. If the end has been cut off, ask. A stamp on the rack is useful; a stamp on the stick is better.
The 4x2 problem
Here is where a lot of confusion starts. In old money, 4x2 means four inches by two inches, roughly 100 mm by 50 mm. But a modern regularised CLS stud is often around 38 x 89 mm. That is not 4x2 in the old rough-sawn sense. It is a different product that has taken over the same nickname.
Some yards will sell you a 47 x 100 mm regularised section as 4x2. Others will point you at 38 x 89 mm CLS. Both can be called 4x2 in conversation, and neither is wrong if everyone understands what is being sold. The trouble comes when one person is thinking of a nominal size and the other is thinking of the actual finished size.
So ask for the actual dimensions. Ask whether it is regularised or rough sawn. Ask what grade it is. A good merchant will not mind. A vague answer is a warning sign.
Matching the stick to the job
For a standard internal stud wall, the timber needs to be straight enough to line up, dry enough not to shrink into a banana once the plasterboard goes on, and stiff enough for the spacing you are using. Studs at 400 mm centres give a stiffer wall. Studs at 600 mm centres are common too, but they need to be straight and properly fixed, and they are less forgiving if the timber is poor.
Use treated timber where it is genuinely at risk of damp, such as sole plates in contact with masonry or in a garage or outbuilding. Do not assume treatment makes a bad board good. It does not. It just helps the right board last longer in a wetter place.
And give the timber a chance. Store it flat, off the ground, with sticks between the layers so air can move. Let it settle before you cut and fix it. Timber that has been crammed into a damp corner or baked next to a radiator will move once it is in the wall.
When cheap studwork is fine, and when it is not
Cheap studwork timber is fine when it is going into a straightforward internal partition, when it is reasonably straight and when you are not asking it to do anything structural. A shed lining, a service void or a bit of boxing-in does not need the best board in the yard.
It is a false economy when the timber is twisted, wet or full of big knots and you are trying to build a long, flat wall. You will spend the difference in time, screws, plasterboard adhesive and swearing. It is also a false economy when the specification calls for a graded structural section and you accept an ungraded lookalike because it is cheaper on the day.
A short checklist for the counter
Before you pay, get these clear: the actual finished size, the grade, whether it is regularised or rough sawn, whether it is treated, and what it is being used for. Then look at the pile. Pick out the straight ones. Check the ends. If something feels light and hollow, put it back.
That is not being fussy. That is buying timber properly.
The best studwork timber is not the cheapest or the most expensive. It is the right section, properly graded, straight enough for the job and dry enough to stay that way. Get that right at the rack and the wall will go up a lot easier.